Mahiru Kamimori のすべての投稿

お話を書いたり、絵を描いたりしています。ノベルアプリ『KIRIKA~同じ人間がいる、もう一つの世界~』をAndroidとiPhoneで配信中です!

【Androidアプリ作成】英語と日本語で使い分けるには?

もうすぐ6月ですね。。
初回リリースのアプリを6月上旬に公開しようと考えていますが、
間に合うか不安です。

私の作っているアプリも日本語と英語をサポートしています。
しかし、特別なプログラムを書いたり必要はAndroidに関しては全くありません。

Androidは自分のスマートフォンの地域(Locale)設定によって
英語のXMLを読むか、日本語のXMLを読むか決めることができるのです。

そのXMLファイルを保存するのがvaluesフォルダです。(resフォルダの下に入ってます)
ここに英語で表記したいものを指定を入れておきます。

日本語で表記したいのはvalues-jaフォルダに入れます。

ちなみにdrawableフォルダもdrawable-jaとつけることで振り分けが可能です。

プログラムとしては、日本語の指定がなかったら(values-jaに指定ファイルが入ってなかったら)
英語の方を読みに行くという感じです。

values > string.xml

<?xml version="1.0" encoding="utf-8"?>
<resources>
<string name="game_name">GAME_TITLE</string>
<string name="game_genre">Shooting</string>
</resources>

values-ja > string.xml

<?xml version="1.0" encoding="utf-8"?>
<resources>
<string name="game_name">ゲームタイトル</string>
<string name="game_genre">シューティング</string>
</resources>

呼び出し側のXML

<TextView
android:text="@string/game_name">
</TextView>

これだけで切り替えができます!
ぜひぜひ試してみてください^^

2011.5.28
神森 真昼

SoundPoolを使う際の注意点

Androidでサウンドを鳴らす際は、
BGM(曲)用途ならMediaPlayer、SE(効果音)用途ならSoundPoolを使うのが簡単。

今回、SEを鳴らすためにSoundPoolを使ったところ、
音声がループ回数を1回(=ループしない)でのみ再生する指定をしたにも関わらず、
2回ループしてしまう現象が発生した。

/res/rawに入れる音声データを、
WaveフォーマットからOgg Vorbisで変換することで
2回ループして再生されることはなくなった。ヾ(・∇`)ノ゙

wavに関しては、「16bitの44KHzのモノラル」でも、
「8bitの22KHzのモノラル」でも不具合が出たので
どのフォーマットでも発生しそうな気がする。
Galaxy S(GT-I9000)で発生したため、端末の問題な気もするけど、
アプリに組み込むリソースは初めからoggで用意したほうが
トラブルしなさそうだと思った。

・・・

ちなみに、Wave→Oggの変換には以下のツールが便利。

■oggdropXPd
http://rarewares.org/index.php
Downloads > Ogg Vorbis > oggdropXPd

ツールを起動してファイルをドロップすれば、
ドラッグ元に出力される。
複数ファイルもまとめて変換できる。
変換中の魚のアニメーションが可愛い・・・

2011.5.28
NECO

【Androidアプリ作成】android:orientationプロパティのverticalとhorizontalの違い

昨日はwrap_contentとfill_parentについて書きましたが、
これもまた基礎で今日は、android:orientationプロパティについて書きます。

つまり結論からいうと

■ 縦方向にレイアウトしたい場合:vertical
■ 横方向にレイアウトしたい場合:horizontal

という感じです、(^▽^)ノ

verticalとhorizontalどっちも聞きなれなくて、
アプリ作成はじめはどっちがどっちかわからなくて覚えれなかったけど、
Webコーディングをやったことある人は
「vertical-alignは縦方向の位置を設定するから・・・
vertical-align・・・vertical・・・お、これは縦方向だ!!」

これで覚えましょう!!!(>▽<)>ラジャ

ちなみに横方向(horizontal)で指定して、<Button>をたくさん作成して、
そのボタンがwrap_contentが指定されていた場合にどうなるか・・・
horizontalはあくまで横方向なので、ボタンが大きいと画面から切れてしまいます。
(つまり自動的に改行されるものではないので注意が必要です。
それは、verticalも同じですが・・・)

もし、ボタンで埋め尽くされた画面を作りたいと考えているのならば、

//大きな大きな箱です。(A)
<LinearLayout
android:layout_width="fill_parent"
android:layout_height="fill_parent"
android:orientation="vertical">

//大きな箱です。(B)
<LinearLayout
android:layout_width="fill_parent"
android:layout_height="fill_parent"
android:orientation="horizontal"
android:layout_weight="1">

//横方向に欲しい数だけ<Button>要素を記述します。
<Button
android:layout_width="fill_parent"
android:layout_height="fill_parent"
android:layout_weight="1"
android:text="1"></Button>

//<Button>要素書き終わったら(B)を閉じます。
</LinearLayout>

これ以降は縦方向に欲しい数だけ(B)の要素をコピペしてください。
そして(A)を閉じます。それだけなんです。
ボタンを作るのは意外にカンタンなんですよ♪

2011.5.27
神森 真昼

【Androidアプリ作成】wrap_contentとfill_parentの違い

Androidアプリを制作してみてまず最初はレイアウトから入ると思われますが、
wrap_contentとfillparentというのが設定できます。

この違いをしっかりとわかってないと大変です(@_@;)

wrap_contentは文字列長に大きさが変化します。
文字列が長ければ長いほど、それに従い大きくなるのです。

fill_parentは画面の大きさに合わせてぴったりあわせてきます。
もしも横の長さが300mmだとしたら300mmの長さのボタンが作成されます。
並列にボタンを3つ作成し、fill_parentとした場合は
100mmの長さのボタンが3つできるわけです。

つまり画面にぴったしのものを作ってくれるのですね。
わたしはそんな感じに解釈して適当に作っていますが・・・だめ??(:;)

2011.5.26
神森 真昼

【Androidアプリ作成】ボタンのカスタマイズ

<Button>タグを使ってbuttonを作っていってもよいが、
私はデザインにもこだわりたいので、定義ファイルを別で作成してみました。

定義ファイルを一つ作成しておくと、それを呼び出し定義すれば
ボタンのデザインのテンプレートが完成です(^ω^)ノ
ちなみにこれを使えばボタンを透過にすることもできちゃいます!
透過する場合は色指定を6桁ではなく、8桁で指定。
#40000FFみたいな。

ちなみに今回は今作成中のアプリのボタンデザインです。
3つの<item>タグはそれぞれプレス(押したとき)、フォーカス(hoverしたときだが、マウスなどのポインティングデバイスで操作しなければ実行動作がわからないという罠)、ノーマル(何にもないとき)の設定です。

■game_select_button_stateful.xml

<?xml version="1.0" encoding="utf-8" ?>
<selector xmlns:android="http://schemas.android.com/apk/res/android">

//押したときの設定
<item android:state_pressed="true">
<shape android:shape="rectangle">
<corners android:radius="5dip" />

//グラデーションの指定(gradient)
<gradient
android:angle="90"
android:endColor="#CBF1A2"
android:startColor="#9EE33B" />

//ボタンのパディング
<padding
android:top="10dip"
android:bottom="10dip"
android:left="0dip"
android:right="0dip" />

//ボタンの線
<stroke
android:width="3dip"
android:color="#80D580" />
</shape>
</item>

//クリックしたときの設定
<item android:state_focused="true">
<shape android:shape ="rectangle">
<corners android:radius="5dip" />
<gradient
android:angle="90"
android:endColor="#CBF1A2"
android:startColor="#9EE33B" />
<padding
android:top="10dip"
android:bottom="10dip"
android:left="0dip"
android:right="0dip" />

<stroke
android:width="3dip"
android:color="#80D580" />
</shape>
</item>

<item>
//何も条件がない通常の設定
<shape android:shape ="rectangle">
<corners android:radius="5dip" />
<gradient
android:angle="90"
android:endColor="#A9E665"
android:startColor="#80BF2B" />
<padding
android:top="10dip"
android:bottom="10dip"
android:left="0dip"
android:right="0dip" />
<stroke
android:width="3dip"
android:color="#339933" />
</shape>
</item>
</selector>

・・・とこんな感じの定義ファイルを作成しましたら、
あとは使いたいところで呼び出すだけです。

■呼び出したいところのXML

<Button
android:background="@drawable/game_select_button_stateful">
</Button>

2011.5.25
神森 真昼

Canvas#setMatrixを使ったアニメーション

画像を変形したり、図形を回転させたりする際には

Canvas#setMatrixを使ったほうが便利なことがある。

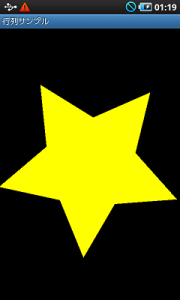
例えば、星型の図形を回転させるアニメーションを作りたいとする。

手順は以下のようになる。
(1) 事前に星の図形(Path)を作っておく。
(2) 回転角を求める。
(3) 回転行列を作成する。
(4) Canvas#setMatrixする。
(5) Canvas#drawPath

高度なことをするにはOpenGL ESを使う必要があるが、
簡単な図形であれば、手軽に変形できるので便利。

完成すると以下のような図形がくるくる回転する。

20110519_and

・・・そして下のが実際のコード。
■Activity
package net.darkdrive.android.sample.matrix;

import android.app.Activity;
import android.os.Bundle;

public class SampleMatrixActivity extends Activity {
@Override
public void onCreate(Bundle savedInstanceState) {
super.onCreate(savedInstanceState);
setContentView(new SampleMatrixView(this, null));
}
}

■View
package net.darkdrive.android.sample.matrix;

import android.content.Context;
import android.graphics.Canvas;
import android.graphics.Color;
import android.graphics.Matrix;
import android.graphics.Paint;
import android.graphics.Path;
import android.graphics.Rect;
import android.os.Handler;
import android.os.Message;
import android.os.SystemClock;
import android.util.AttributeSet;
import android.util.FloatMath;
import android.view.View;

public class SampleMatrixView extends View
{
// Paint
private final Paint paint;

// 星の図形
private final Path star;

public SampleMatrixView(Context context, AttributeSet attr) {
super(context, attr);

// 背景色は黒
setBackgroundColor(Color.BLACK);

// Paint
paint = new Paint();

// (1) 事前に星の図形(Path)を作っておく。
star = new Path();
star.moveTo(0.0f, -1.0f); // 大きさは半径1の円に収まる大きさにしておく
for ( int i = 1; i <= 10; i++ )
{
float rad = 2 * (float)Math.PI * i / 10;
float len = (i%2==0)?1.0f:0.5f;
star.lineTo(FloatMath.sin(rad)*len, -FloatMath.cos(rad)*len);
}

// 再描画タイマーを作成
Message msg = timerHandler.obtainMessage(INVALIDATE);
nextTime = SystemClock.uptimeMillis();
timerHandler.sendMessageAtTime(msg, nextTime);
}

private static final int INVALIDATE = 1;
private long nextTime;

private static final int INTERVAL = 1000/20; //20fps

private int frameCount = 0;

// タイマーイベント
private final Handler timerHandler = new Handler() {
@Override
public void handleMessage(Message msg){
if ( msg.what == INVALIDATE )
{
// (2) 回転角を求める。
frameCount++;

//画面を再描画
invalidate();

msg = obtainMessage( INVALIDATE );
long current = SystemClock.uptimeMillis();
if ( nextTime < current )
{
nextTime = current + INTERVAL;
}
sendMessageAtTime(msg,nextTime);

nextTime += INTERVAL;
}
}
};

/**
* 描画
*/
@Override
protected void onDraw(Canvas canvas)
{
Rect clip = canvas.getClipBounds();
int width = clip.right;
int height = clip.bottom;

Matrix project = new Matrix(); // 単位行列を生成

// (3) 回転行列を作成する。
project.postRotate(frameCount); // 回転
project.postScale(250.0f, 250.0f); // 縦横250倍に拡大
project.postTranslate(width/2.0f, height/2.0f); // 画面中央寄せ
project.postConcat(canvas.getMatrix()); // 元の描画位置を加算する

// (4) Canvas#setMatrixする。
canvas.setMatrix(project);

// (5) Canvas#drawPath
paint.setStyle(Paint.Style.FILL);
paint.setColor(Color.argb(255,255,255,0));
canvas.drawPath(star, paint);
}
}

・・・・投影用の行列を書き換えただけじゃん!と言われたら、ぐうの音も出ないですが。。。

2011.5.19
NECO

LinearLayoutを使ったボタンレイアウト

LinearLayoutを使ったボタンレイアウトでつまずいたので備忘録。

こんな感じのレイアウトを作ってみた。

20110512_layout

Androidアプリではレイアウトはxmlで作成できるので、
以下のようなXMLを記載した。
■/res/layout/main.xml
<?xml version=”1.0″ encoding=”utf-8″?>
<LinearLayout
xmlns:android=”http://schemas.android.com/apk/res/android”
android:layout_width=”fill_parent”
android:layout_height=”fill_parent”
android:orientation=”vertical”>
<LinearLayout
android:layout_weight=”1″
android:layout_height=”fill_parent”
android:layout_width=”fill_parent”
android:background=”#000000″
android:orientation=”vertical” >
<LinearLayout
android:layout_weight=”1″
android:layout_height=”fill_parent”
android:layout_width=”fill_parent”
android:orientation=”horizontal” >
<Button
android:layout_weight=”1″
android:layout_width=”fill_parent”
android:layout_height=”fill_parent”
android:textSize=”@dimen/button_font_size”
android:text=”1″ />
<Button
android:layout_weight=”1″
android:layout_width=”fill_parent”
android:layout_height=”fill_parent”
android:textSize=”@dimen/button_font_size”
android:text=”2″ />
</LinearLayout>
<LinearLayout
android:layout_weight=”1″
android:layout_height=”fill_parent”
android:layout_width=”fill_parent”
android:orientation=”horizontal” >
<Button
android:layout_weight=”1″
android:layout_width=”fill_parent”
android:layout_height=”fill_parent”
android:textSize=”@dimen/button_font_size”
android:text=”3″ />
<Button
android:layout_weight=”1″
android:layout_width=”fill_parent”
android:layout_height=”fill_parent”
android:textSize=”@dimen/button_font_size”
android:text=”4″ />
</LinearLayout>
<LinearLayout
android:layout_weight=”1″
android:layout_height=”fill_parent”
android:layout_width=”fill_parent”
android:orientation=”horizontal” >
<Button
android:layout_weight=”1″
android:layout_width=”fill_parent”
android:layout_height=”fill_parent”
android:textSize=”@dimen/button_font_size”
android:text=”5″ />
<Button
android:layout_weight=”1″
android:layout_width=”fill_parent”
android:layout_height=”fill_parent”
android:textSize=”@dimen/button_font_size”
android:text=”6″ />
</LinearLayout>
</LinearLayout>
</LinearLayout>

それから実際に書いたプログラム部分

■/src/MainActivity.java
public class MainActivity extends Activity {
@Override
public void onCreate(Bundle savedInstanceState) {
super.onCreate(savedInstanceState);
setContentView(R.layout.panel);
}

}

LinearLayoutのパラメータの説明はここを参考にした。
<http://developer.android.com/intl/ja/reference/android/widget/LinearLayout.html>

これだけで冒頭のレイアウトができたわけで。
あとはちょちょいとイベントリスナーや描画処理を追加すればアプリができそうな気がする。

これからも頑張るぞ!

2011.5.12
NECO

fontの入れ替え

Androidに最初から搭載されているCJKフォントに違和感を感じたので、変更してみた。

以下手順で行った。
1, フォントを取得
2, 既存のフォントを置き換え

1に関しては問題ないが、
2が結構めんどくさかった。

以下、2の詳細手順
2-1, root取得
フォントが格納されている/system/fontsには
書き込み権限がないため、rootになる必要がある。

端末によりけりなのでぐぐって対応した。
2-2,
busyboxの導入
標準でシェルコマンドのcpやrmが使用できないので
AndroidMarketから取得。
2-3, 置き換える。
>adb pop /system/fonts/DroidSansFallback.ttf

DroidSansFallback.ttf
←バックアップ
>adb push xxxxx.ttf /sdcard
>adb shell
$su
#rm
/system/fonts/DroidSansFallback.ttf
#cp /sdcard/xxxxx.ttf /system/fonts/DroidSansFallback.ttf
#reboot

これで置き換えが完了!

20110428_font

もっと導入を簡単にできれば、個性が出し易くなって
暮らしが豊かになるような気がする。

2011.4.28
NECO

Androidの音声認識の罠

音声認識のAndroidアプリを作りたい!
そう思って、音声認識のRecognizerIntent.ACTION_RECOGNIZE_SPEECHに手を出してみた。

実装を終え、実際に動作させてみた。
だが、以下のエラーメッセージでぶち当たる。

「接続エラー」

・・・ぐぐったところ、どうやらRecognizerIntent.ACTION_RECOGNIZE_SPEECHでは
googleのRecognitionServiceに接続するとのこと。

案の定、端末がネットから切断されていたので、接続するようにしたら解消された。

今振り返ってみると罠でも何でもないかもしれない。

今後ゲームとかで使うことになるなら、それとなく取得できるようにする必要があるかも。

2011.4.26
NECO

Androidの時計アプリを作ってみた

今回は定期実行のプログラムのテストを兼ねて時計アプリを作ってみた。

ついでに、前回導入したデバッグ機能を使って、端末上のアプリのスクリーンショットを撮った。

20110425_clock1 20110425_clock2  

でも、Androidっぽいことに何一つ触れてないことに、
ブログ書いてる途中に気づいた。

次回は、タッチイベントとか音声入力とかかな。

2011.4.25
NECO